In today’s tutorial we will be adding a product to our WordPress website with WooCommerce.
First things first. WooCommerce is a great e-commerce plugin for WordPress. This article will assume you’ve already installed and set it up.
All of the steps are not technically needed, but I highly recommend you complete all of them for every article as this aids with usability, SEO, appearance and sharing to other platforms.
For more in depth training you can have a look at WooCommerce’ own documentation at: https://docs.woocommerce.com/
Let us get started:
Step 1 – Log into the admin module
Go to http://yourdomain.com/admin
Provide your username and password and click on log in.
You should now see the your dashboard
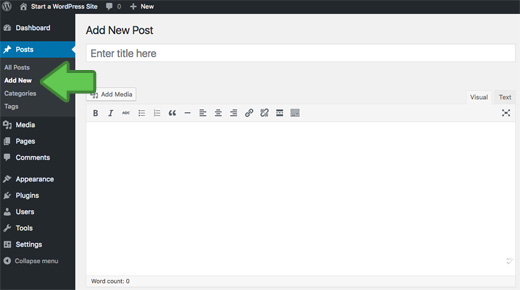
Step 2 Click on Products – Add New
Step 3 – Give your product a title
This is usually is the product name and can include the brand and model of your product or service.
Step 4 – Add the main content
This can be text, video, images, etc. The interface works much the same as your basic word processing programs with a toolbar at the top that can be used to format text or insert content. Here you can add anything from videos to full technical details
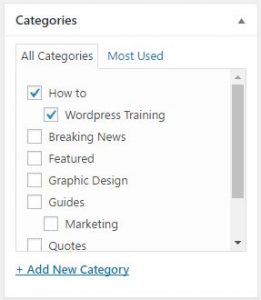
Step 5 – Choose your category
There can be more than one. This is especially useful if your website displays certain categories on different pages. It is important to add a product to category. Depending on how your site is set up, your product might not display at all if it is not assigned to a category.
Step 6 – Add Tags to your product
This is comes in handy when a visitor searches for keywords. Search engines also use this to categorize your products.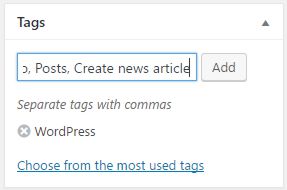
Step 7 – Set a featured image
Featured images is used when you share an article to social media like Facebook to give your post a better look. It is the image that is displayed in search results and the first image on any page.
Step 8 – e-Commerce details
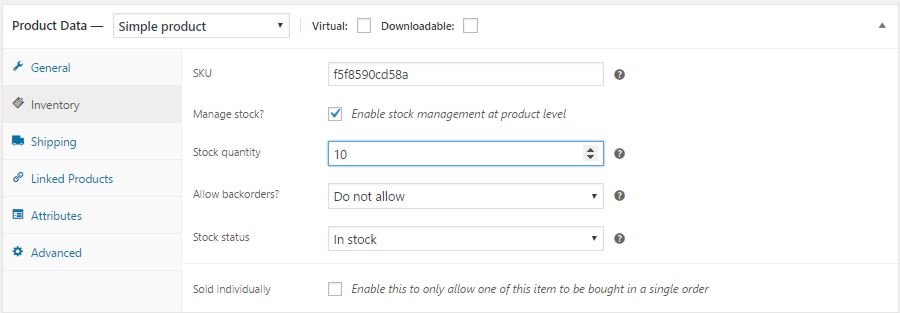 Now you can navigate to the “Product Data” just below the description. This section contains multiple subsections that can be accessed by clicking on the tabs.
General:
Set the price and the sale price. If you add a sale price the product will automatically be displayed as a sale product. You can also schedule the sale. When the sale dates are set your site will automatically display the product as “on sale” between the selected dates.
Inventory:
WooCommerce is great at managing stock levels. You can also combine it with point of sale plugins that allows you to use your online shop as an in-store point of sale system.
Shipping
Add your product dimensions and weight information used for shipping purposes.
Linked Products
This is where you can add other products that the user might be interested in. Products in the same category will automatically be displayed as “related products”
Attributes
This can be very handy. You can add standard attributes like Manufacturer, size, technical specifications, etc. Depending on your theme this is usually displayed in a grid format.
Step 9 – Short description.
The short description is the description that is shown in the search results. Try to keep it to a single paragraph stating the most crucial information.
Step 10 – Publish.
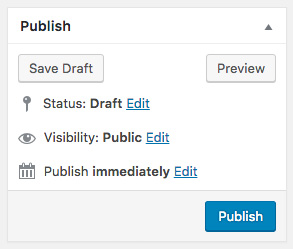 Publish your product by clicking on the publish button top right.
If you want to, you can post date or predate by clicking on “edit” next to “Publish immediately” and changing the date
When post dating, your article will only become visible at the chosen date and time.
After this step your article will be visible on your website.


